Showing posts with label Beacon Publications. Show all posts

6.30.2026

FINNished

After sitting about for several months and lately inspired by my friend Scott who is working on Finns, I completed six Model 75As today. I just needed to do some touchup, add decals, put a little decal set on same, and then hit them with a coat of gloss and a coat of matt varnish. While not perfect (my yellow is so thin that even after five coats there is some bleed and a few other little paint gaffs) they are pretty decent gaming pieces.

Ready to face those sneaky Soviets - looking much darker and shinier in the pic

I went with the early war scheme - as these had been planes the Germans had taken from the French and Norwegians they had been painted in RLM71 (Dunkelgrün) over RLM65 (Hellblau) by the Germans and left that way by the Finns (the more known black and olive green scheme came into use later in the war). I used Vallejo Model Air paints for nearly all the work (the aforementioned RLM71 and RLM65 along with natural metal, chrome yellow, and NATO black), the exception being Foundry Bavarian blue on the canopy. National insignia are decals from Beacon (from I-94) which are nicely done individual decals (although I split one somehow) and finished with numbers from Flight Deck Decals. Oh, the miniatures themselves are crackin' good 3D prints, also from Flight Deck.

The color is better in this snap - and now I see more touchup work needing to be done!

5.11.2026

Blue Falcon Hobbies Decals

While designed for the FJ-3 Fury, these will be used to enhance my FJ-4s

Yowsa! Yet another company making some high quality decals for our toys! I placed an order with Blue Falcon recently - only having heard of them from a post on the Check Your 6! discussion group - and I must say the decals look spectacular. 

This sheet will save me from having to paint the wingtip and rudder markings!

Blue Falcon produces over one hundred decal sheets, most based on specific squadrons, from World War Two up to the modern era. The print quality is crisp, and I believe that each decal is a separate decal (think Beacon from I-94 or Scale Specialties from same), which means not a lot of trimming around the decal has to be done I'll will update this post once I actually apply some of these decals).

Yeah, I got a thing for those Hellcats of VF-27.

Ordering was a breeze on the Blue Falcon website. Service was good as well - about a week from date of order to date of receipt. However, I also reached out to them about some custom sheets I would like to have completed, and to date, no response had been forthcoming.

A very useful sheet for Korea.

Regardless of my pending inquiries with Blue Falcon, I am rushing back to their site to buy more decals, and some of their paints! You should head there, too! Blue Falcon Hobbies

10.26.2025

Baltic Encounter - Planes Completed

The bad guys - East German MiG-15 and MiG-17

This post was an effort to push me to take care of the chore of adding decals to planes that were mostly painted and just awaiting those final touches that bring a miniature to life. Applying decals is not what I call an enjoyable task, and I think it is mostly from a time perspective that I dally when it comes to this stage of completing planes for the table top. I have my system worked out fairly well - put a little gloss finish where the decals will be applied (this makes it easier to move the decal into proper position), apply Vallejo decal fix, cut the decal, soak in hot water while holding a non-printed corner with tweezers, and after about twenty to thirty seconds of soaking slide the decal into place with a brush end (although sometimes I forego the gloss and even the decal fix as I have also had good luck in not using either). If needed I roll a Q-Tip over the decal to absorb the excess water while pushing out any bubbles, and adjust the decal so that it is perfectly placed. Once the decal is dry, I brush on Vallejo decal softener which "melts" the decal so as to conform to ribbing or panel lines. To complete the process, and the plane, I spray with satin finish from Army Painter.

In this particular case I used Flight Deck Decals for the Swedish and East German national insignia and Dom's Decals for the Americans (I had a sheet I picked up in a trade for some Korean War planes years back). The blue letters on the J 29s and the red numbers on the MiGs are from I-94 as part of their Beacon range. Flight Deck's decals come as one complete decal sheet and one needs to carefully trim around the desired decal, while Dom and Beacon decals are easier to deal with since the decal is just the printed portion. Flight Deck and Dom's take a little longer to soak and loosen, while the Beacon decals are usually ready to slide off in ten seconds. 


Free world nations' FJ-4 and J 29

The blue letters came out a little light and are not very noticeable, but the red numbers on the MiGs certainly catch the eye. Overall I am fairly happy with the outcome. There are some issues on the national insignia decals on the bottom of one J 29, caused I think by too much decal fix, and even the coat of satin finish didn't really correct the haziness around the decal, but luckily it is on the bottom and really not noticeable. 

These planes are now ready for the tabletop, and to be used for my Baltic Encounter scenario found on the Downloads page.

10.20.2025

I-94 Decals

For my next batch of decals I ordered a few sheets from I-94 Enterprises. I believe I am turning into a decal hoarder, but that's another post....

For my order with I-94, I was looking to pick up some items to help complete some projects and move forward on others. I have used I-94 decals before and they are quite good, and quite affordable. From what I gather what I-94 offers is mostly from the older Beacon range. I-94 also carries the Scale Specialties range, which includes some very unique and useful items, at a higher price point, but the sheets contain markings for numerous aircraft in most cases.


My first sheet is simply blue lettering, which also includes blue numbers. The blue letters are needed to complete my Swedish J 29s for my 1950s Baltic Encounter scenario. Not certain how much additional use I will get from this sheet, and while I could have simply left the letters off the miniatures, I wanted to have a "more complete" looking set of Tunnans.

The second sheet, having black lettering and numbers for United States naval aircraft, pushes me closer towards my Operation Torch project, the sheet also having some letters and numbers for Coral Sea USN aircraft. One of the items I have been working on is a small scenario book and guide to the American Atlantic portion of Torch and have about eight scenarios in mind.

A number of planes can be decaled with just this one sheet

The next two sheets are Scale Specialties offerings. The first is one I need for Japanese naval aircraft for Wake Atoll - I went with the Hiryu/Soryu sheet as that will work for both the Pearl Harbor Second Strike scenario and a few scenarios I have put together for my Wake scenario book. The sheet includes insignia and aircraft marking for Zekes, Vals, and Kates.

While not having a lot of Spanish Civil War decals, there are plenty for the early WWII period Messerschmitts

The second Scale Specialties sheet I ordered is catered to Bf 109s for both the Spanish Civil War and early WWII. However, I will be using these for my half dozen Heinkel He 100s. As these planes were never used in combat, taking a few oddball squadron insignia from the 109s doesn't really feel that off to me.

4.03.2025

Adding More Nieuports

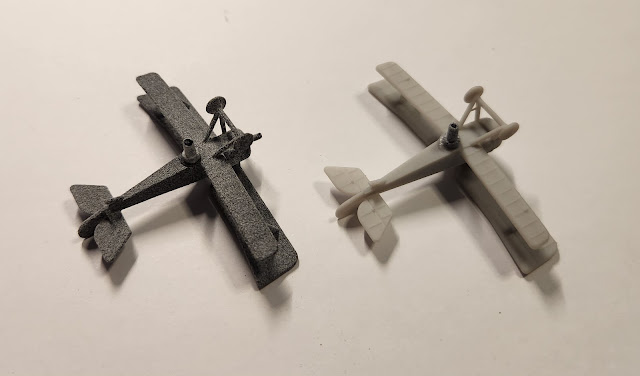
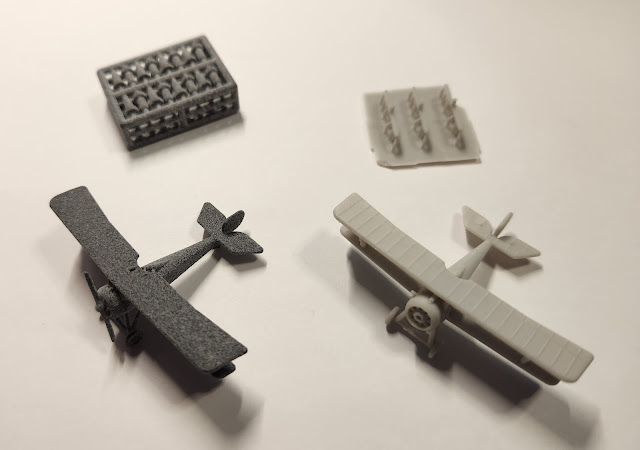
Shapeways on left, Table Top on right. Posts and props as well.

For some months I have had a couple of 1/144 Nieuport N.17s awaiting prep, paint, and decals. One model is a Shapeways with the improved print material, and the other is a Table Top Flights offering. With my recent efforts in adding life to three Ares miniatures, I thought it might be nice to add to my Lafayette Escadrille's stable of available Nieuports.

Preparation
Neither plane came with posts, so luckily I did order posts from Shapeways before they declared bankruptcy. A couple of cuts with the X-ACTO knife to remove the pegs from the sprue, some filing to the edge that gets glued to the plane, and then a little superglue, and the pegs are securely in place.
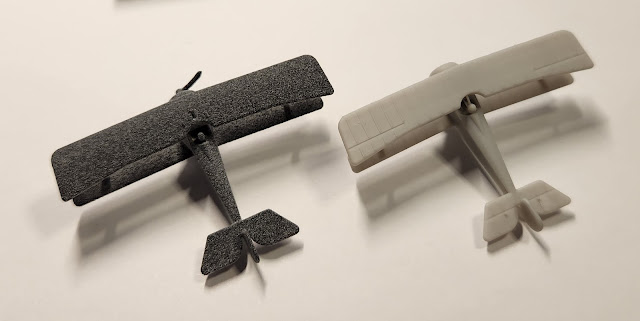
Comparing the two materials - Table Top is smoother and more detailed

Posts added, time for priming

After drying the next step was a coat of primer. Normally I use some AK Interactive gray that I brush on, but last time I used it it had become quite separated, and rigorous shaking yielded undesirable results. Fortunately I had a can of Testers Panzer Gray, which I have used as primer in the past, and I really love the smooth coverage Testors provides.

After priming it was on to painting.

Painting
I already have the "T" and three red bar Nieuports, plus a white band one that I converted from another three bar Ares. Another historical scheme was simply the Seminole Indian head with the national insignia. Okay, that is easy enough. But what about the second one?

My friend Dan (camelbeagle on the Wings of Glory Aerodrome) had a Soubiran version already, using decals from the Valom kit (although I am not certain if the decal's fuselage band color is correct - the decal is black, but the band might actually be red). I also know I cannot pull off letters like "ECP" as that becomes too fiddly and I do not have the ability to print my own decals. One also needs to keep in mind that many of the schemes found searching the world wide web are simply wrong. And the two books I have that include color plates cover the same aircraft I already have or cannot pull off.

And then I remembered - I had bought one of the Nieuports to do a Russian version! And I already have the Russian decals for the scheme I wanted to tackle, and it, too, is a silver doped plane. Sooo, the rest of this post will focus on the Lafayette version, which will simply be a plain plane, with national insignia and Seminole heads!

A close approximation for the silver-doped Ares Nieuport 17 is a mix suggested by Dom from Dom's Decals. Take six parts of Vallejo silver and blend with five parts Vallejo natural steel. I also thin this mix with a little water - metallic paints can be think and I would rather put on a couple of coats of thin paint than a thick one susceptible to clumping. Or, let's make it even simpler - just use Vallejo aluminium (yes, the British spelling). The Model Air range of Vallejo paints are a bit thinner in viscosity, and one does not have to mix paints, and the color is very close to the Ares Nieuports. Plus, we all know that paint widely varied during the war due to weather conditions, and different factories doped fabric differently.
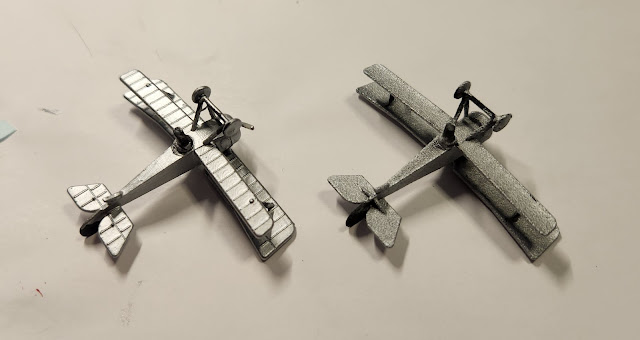

One coat coverage -  the Shapeways version is so shite I am not going to even bother

After the primary color had been applied (and I only needed one coat with a few touchups after), I moved onto the rudder. I used Vallejo white and carmine red, along with Foundry Bavarian cornflower blue (shade 73A).  I was able to use masking tape for the red segment, and I tried lining up a business card to help keep the rest of the lines straight (an idea shared by CrashCraig), but it is still a bit sloppy. And it was the old "Let me fix the white. Damn, went over on the blue too much. Okay, fixed the blue, but got it in the white. Okay, fixed the white, but now I have to correct the red" sort of thing). After doing this several times, I said "feck it" and now it is what it is. From three feet away it looks decent.

While waiting on rudder colors to dry, I added Vallejo flat brown to the outer struts, propeller, pilot, and tail skid. I also painted the machinegun, motor cylinders, and propeller hub Vallejo natural steel. A touch of Vallejo medium sea gray was applied to the tires.


Decals
Now the fun part - the finishing touches that add color to the Lafayette Escadrille Nieuport 17. I used Beacon Publications decals (available from I-94 Enterprises) for the French roundels. Alas, the sizes available do not perfectly align with the Ares planes - for example the top wing roundel on the Ares plane is 7mm, while the closest size Beacon decals are either 8mm or 6mm. I went with the smaller of the two as I did not want the roundel to come across as cartoonish by being too large. Then I applied the Miscellaneous Miniatures Sioux heads to each side of the plane. In both cases I put a spot of Vallejo decal fix on the plane, and after some drying coated the decal with Vallejo decal softener, which allows the decal to conform to the miniature. After drying I then coated the plane with Vallejo gloss varnish to match the other Lafayette Nieuports.


Conclusion
This is the not first Table Top Flight plane I have painted for Wings of Glory (see HERE), and I will say that in every case the material used by Mike at Table Top really does take paint very well, unlike the Shapeways model with it obvious grainy texture. This particular Lafayette Escadrille Nieuport was a rather simple project to take on, and I completed it over the course of three days. The color is a tad off, and perhaps using the mix suggested by Dom might have resulted in a matched aircraft, but overall it works.

Mat - Deep Cut Studio